Rapid Upper Limb Assessment (Right & Left Side)
Part A. Arm & Wrist Analysis
Step 1: Locate Upper Arm Position (Right)
Part A. Arm & Wrist Analysis
Step 2: Locate Lower Arm Position (Right)
Part A. Arm & Wrist Analysis
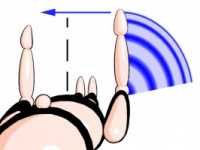
Step 3: Locate Wrist Position (Right)
Part A. Arm & Wrist Analysis
Step 4: Wrist Twist (Right)
Part A. Arm & Wrist Analysis
Step 5: Arm & wrist - select the force and load that most reflects the working situation (Right)
Part A. Arm & Wrist Analysis
Step 6: Locate Upper Arm Position (Left)
Part A. Arm & Wrist Analysis
Step 7: Locate Lower Arm Position (Left)
Part A. Arm & Wrist Analysis
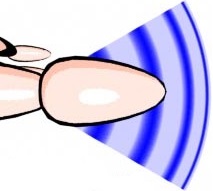
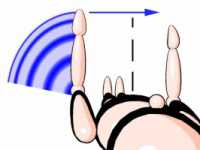
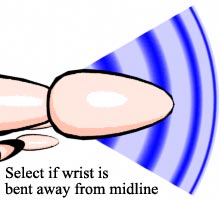
Step 8: Locate Wrist Position (Left)
Part A. Arm & Wrist Analysis
Step 9: Wrist Twist (Left)
Part A. Arm & Wrist Analysis
Step 10: Arm & wrist - select the force and load that most reflects the working situation
Part B. Neck, Trunk & Leg Analysis
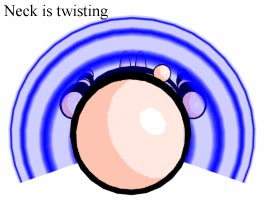
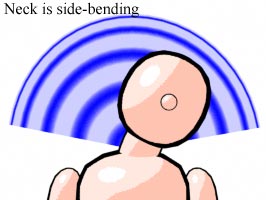
Step 11: Locate Neck Position
Part B. Neck, Trunk & Leg Analysis
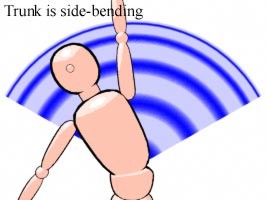
Step 12: Locate Trunk Position
Part B. Neck, Trunk & Leg Analysis
Step 13: Legs
Part B. Neck, Trunk & Leg Analysis
Step 14: Neck, trunk & leg - select the force and load that most reflects the working situation
15. Personal details*
 Next steps:
Progress so far
 Table scores:
If you are familiar with the manual version of RULA, Table A and Table B values are indicated below.
Part A:
- 1. Upper Arm (Right): 0
- 2. Lower Arm (Right): 0
- 3. Wrist (Right): 0
- 4. Wrist Twist (Right): 0
- 5. Muscle Use + Force/Load (Right): 0
- 6. Upper Arm (Left): 0
- 7. Lower Arm (Left): 0
- 8. Wrist (Left): 0
- 9. Wrist Twist (Left): 0
- 10. Muscle Use + Force/Load (Left): 0
Part B:
- 11. Neck: 0
- 12. Trunk: 0
- 13. Leg: 0
- 14. Muscle Use + Force/Load: 0